On January 22, 2013 I posted an inexpensive artwork for a kids room. I have found another style of artwork that can be done for cheap, and this one I think you can use anywhere in your house. My example was done for my daughters room.
I found this artwork and inspiration on Pinterest. I seam to spend a lot of time there lately. You can follow my boards there under Diybydnice and there you will find my Pin on this inspiration.
All that you need is a canvas, size depends on what you want to make, metal washers, crazy glue and your imagination.
I stuck with the letter design, but you can do anything you feel that you can replicate by using round washers.

So as previously mentioned you will need:
- Canvas
- Acrylic Paint (bought from dollar store)
- Foam brush or roller
- Metal washers (bought from Home Depot)
- Crazy glue
So I started off with a blank canvas. Mine was 12x12 and bought for approx. $5.00. I really liked the square size of it.

I painted the canvas pink, as this is my daughters favourite colour. You can paint it any colour, or you can also leave it white.

I put on two to three coats of paint to get an even colour. (In this picture the paint is still a bit wet - hence the purple/blue colour). I also used a hair dryer in between coats to get the paint to dry faster. I was inpatient. This is the nice thing about working with acrylic craft paint. It dries fast. You also won't be doing any gluing for a while, so lots of time to cure.
Then it was time to get the imagination flowing. My daughter said that she wanted the first letter of her first name. So I thought that would be simple enough. Well not really. I used 3 different size washers and had to alternate them to get the thickness and shape that I wanted. You can also perhaps print out the letter from your word document and have a shape and design to follow. This may be handy for next time.
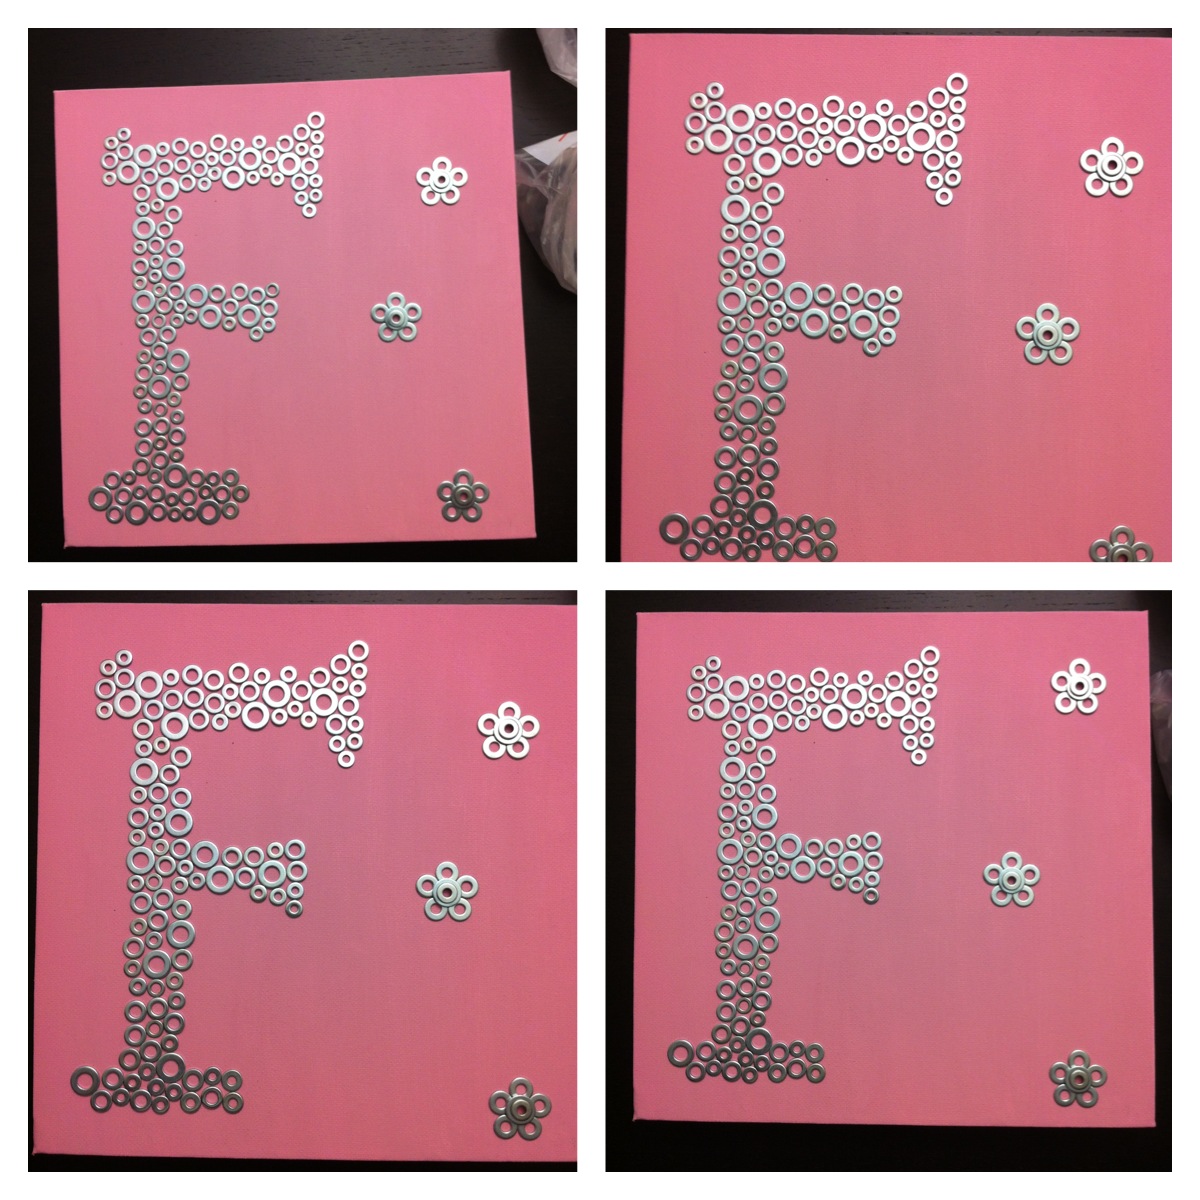
There is no wrong way.... just start somewhere and work your way around. You will do a lot of rearranging of the washers until you get what you want. I changed mine about 5 times, before I obtained the look that I liked. What I also did, was used my camera to take a picture of the finished product from an aerial view, because you can't lift the canvas up to see what it will looks like up on the wall. Trust me when I say that you may think it looks nice when you are looking at it sitting on the table, but then you take the picture and see it from frontal view and it will look different. This is why I ended up changing my washer positions about 5 times. Here are four photos I took from an aerial view (hopefully you can see the changes)

Once you are totally satisfied with the look, comes the painstaking part or gluing all those washers on. I chose this crazy glue, as it is a pen style. All you do is press the pen on the area you want to glue and a little bit of glue comes out. Here is a link to the manufacturers page with information http://www.krazyglue.com
MAKE SURE THAT YOU DON"T GET ANY GLUE ON YOUR FINGERS.

If you do, read the manufacturer instructions on what to do. Just take your time and work carefully. I didn't glue all the washer in one sitting. I did it over a few days. (your fingers will get tired)
As you can see from the finished product, I started my letter on the left side of the project. This was not intentional and I didn't realize until I was done the F. I didn't want to try and move the entire F once to the middle, so I decided to make a couple of flowers from the same washers, to decorate the right side, so it wouldn't look empty.
Here is another picture of the finished project. Total cost will vary depending on how large the project is and how many washers you use. My project totaled close to $25.00.

I guess if you want, you can use a photo frame that has a bit of depth to it. As long as you don't overlap the washers, they don't take a lot of room. I would suggest using cardboard instead of canvas. Paper will not hold the weight of the washers.
I guess you can also spray paint them with a paint that will adhere to the metal. These washers were a bit shiny, so I am not sure how well the paint will adhere to it. Talk to your local paint store and see if there is a product that would work. If you do go this route, I would love to hear what you did and how it all worked.
Happy crafting.
My next blog will be on sprucing up my mother in-laws dated kitchen. Long weekend ahead of me.
No comments:
Post a Comment